Recipes
Try This Keto Chicken Salad for a Healthy Meal!
Incredibly delicious and low-carb, this Keto Chicken Salad is packed with flavor—discover the secret ingredients that make it a must-try!
You will love this delicious Keto Chicken Salad for a fast, healthy meal! To make it, combine grilled chicken pieces with fresh lettuce, purple cabbage, and creamy avocado. Add in walnuts and sesame seeds for an extra crunch and healthy fats. For the dressing, mix Greek yogurt, mustard, olive oil, and spices for a burst of flavor. Let it chill in the refrigerator for at least 30 minutes before serving to enhance the flavors. With only 2 grams of carbs and 18 grams of protein per serving, it is both satisfying and nutritious. Stay tuned for more tips and variations on this tasty recipe!
Key Takeaways
- This Keto Chicken Salad features grilled chicken, avocado, and walnuts, providing a delicious and nutritious meal option.
- With only 2 grams of carbs and 18 grams of protein per serving, it's perfect for low-carb diets.
- The salad is rich in healthy fats, promoting heart health while keeping you satisfied.
- Easy to prepare in under 30 minutes, this recipe is perfect for quick, healthy lunches.
Keto Chicken Salad Ingredients
To make a tasty Keto Chicken Salad, you'll need grilled or cooked chicken, creamy avocado, and crisp lettuce as your base ingredients. This combination not only satisfies your hunger but also aligns perfectly with a low-carb lifestyle. The avocado provides healthy fats that keep you feeling full, while the chicken packs in protein.
For added crunch, toss in some walnuts and sesame seeds. These not only enhance the texture but also contribute healthy omega-3 fatty acids. You can also throw in purple cabbage for a pop of color and extra nutrients.
To elevate your chicken salad, consider adding fresh herbs like parsley or basil, which will boost flavor without increasing net carbs per serving.
For a creamy dressing that keeps it low carb, mix together Greek yogurt, olive oil, mustard, tamari, vinegar, and a clove of garlic. This dressing perfectly balances the flavors while maintaining a healthy profile.
How To Make Chicken Salad
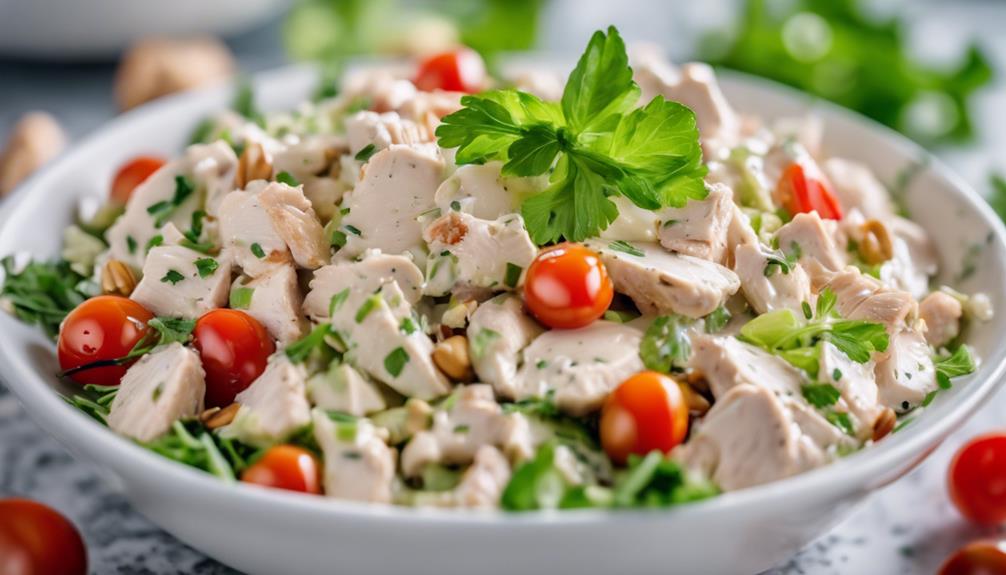
Start by cutting your cooked chicken into bite-sized pieces, using whatever type you prefer for added flavor and convenience. You can choose grilled, rotisserie, or poached chicken for your easy keto chicken salad.
Next, chop fresh vegetables like lettuce, purple cabbage, and herbs such as parsley and basil to enhance the texture and nutrition of your chicken salad recipes.
In a large bowl, combine the shredded chicken with your chopped veggies. For a satisfying crunch, add roughly chopped walnuts and toasted sesame seeds.
Now, it's time to prepare the dressing. Whisk together mustard, Greek yogurt, tamari, olive oil, vinegar, and minced garlic. This dressing adds a flavorful kick to your low carb lunch.
Once everything is mixed, chill the assembled chicken salad for at least 30 minutes. This allows the flavors to meld beautifully, creating a delicious meal prep option that you can enjoy throughout the week.
Serve it on its own or with lettuce wraps for a revitalizing twist. Your easy keto chicken salad is ready to enjoy—simple, nutritious, and bursting with flavor!
Healthy Avocado Chicken Salad
When you whip up a Healthy Avocado Chicken Salad, you'll enjoy not just a tasty meal but also a host of nutritional benefits.
You can easily customize the flavors to suit your preferences, and with a few preparation tips, you'll have a delicious dish ready in no time.
Let's explore the key points to make this salad a go-to recipe for your keto lifestyle.
Nutritional Benefits Overview
Healthy Avocado Chicken Salad packs a powerful nutritional punch with its high protein content and healthy fats, making it a smart choice for those looking to maintain muscle and support heart health.
This Keto chicken salad recipe boasts an impressive 45 grams of protein, perfect for muscle maintenance and recovery. With 36 grams of total fat, primarily from avocados, you're getting healthy fats that promote heart health while keeping you full longer.
Additionally, this low carb chicken salad features only 24 grams of carbohydrates, allowing you to easily fit it into your low-carb lifestyle. The 13 grams of fiber help promote digestive health, ensuring your gut stays happy.
The inclusion of purple cabbage adds essential vitamins and antioxidants, enhancing the overall nutrient profile of your meal. Plus, using Greek yogurt in the dressing not only adds creaminess but also provides probiotics, supporting gut health along with the other nutrient-rich ingredients.
Flavor Variations Available
There are plenty of flavor variations you can experiment with to make your Healthy Avocado Chicken Salad even more exciting and delicious.
Start with marinated chicken seasoned to your taste—try adding some chili powder for a spicy kick or lemon zest for a new twist. You can also incorporate different vegetables like bell peppers or cucumbers to enhance the crunch factor, keeping the salad vibrant and crisp.
Swapping in various toppings can elevate your keto chicken salad. Consider adding sliced almonds for a nutty crunch or feta cheese for a tangy flavor boost. If you're looking for a different dressing, mix Greek yogurt with herbs like dill or basil for a revitalizing alternative that maintains the salad's low in carbs profile.
To further enhance the nutritional profile, throw in some sunflower seeds or hemp hearts. These ingredients not only add flavor variations but also increase the healthy fat content.
Perfect for meal prepping, this salad can be customized easily, allowing you to enjoy a tasty and nutritious meal throughout the week!
Preparation Tips & Tricks
Marinating the chicken in a flavorful blend of spices not only enhances its taste but also guarantees a juicy texture for your avocado chicken salad. Follow these preparation tips to create a delicious keto chicken salad that's both satisfying and nutritious.
Step | Ingredients Needed | Tips |
---|---|---|
1. Marinate | Chicken, coriander, basil, garlic | Cook in olive oil for 5-6 mins |
2. Cool the chicken | Cooked chicken | Prevents wilting other ingredients |
3. Make dressing | Greek yogurt, vinegar, tamari, mustard | Whisk for a creamy, low-carb option |
4. Combine salad | Chopped lettuce, parsley, avocado, walnuts | Add sesame seeds for crunch |
5. Season & serve | Salt, pepper, Parmesan cheese | Adjust seasoning to taste |
After cooling, combine your chopped lettuce, parsley, cabbage, olives, and walnuts with the cooked chicken. This nutrient-rich mix pairs perfectly with your zesty dressing. Don't forget to sprinkle some Parmesan cheese for extra flavor! Enjoy your healthy avocado chicken salad as a delightful low-carb option for any meal.
Nutrition Information
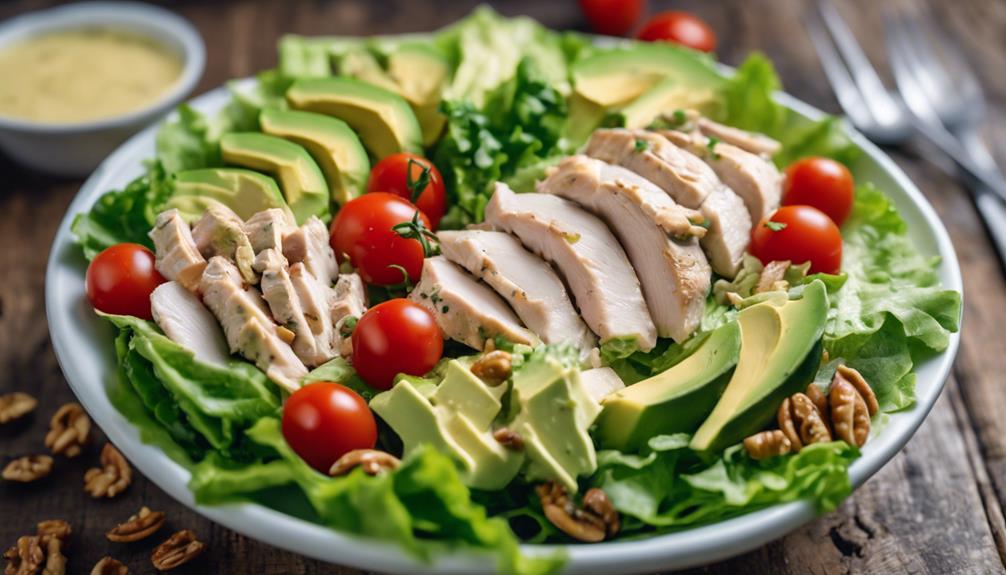
When you enjoy a serving of Keto Chicken Salad, you're getting around 330 calories packed with nutrients.
With only about 2 grams of carbs and a solid 18 grams of protein, it's designed to support your keto lifestyle.
Plus, the healthy fats contribute to your overall well-being while keeping sodium levels low.
Caloric Breakdown Per Serving
Each serving of Keto Chicken Salad packs around 330 calories, making it a satisfying yet low-calorie meal choice. This dish isn't only delicious but also aligns perfectly with your dietary needs if you're following a ketogenic diet.
Here are some key benefits of this easy-to-make salad:
- Low carbohydrates: With only 2 grams per serving, it's great for anyone watching their carb intake.
- High protein content: Each serving offers about 18 grams of protein, promoting muscle maintenance and keeping you full longer.
Additionally, the sodium level sits at approximately 246 mg per serving, making it suitable for those who need to monitor their salt intake.
This Keto Chicken Salad not only fits your low-calorie meal goals but also guarantees you're getting the nutrients necessary for a balanced diet.
Macronutrient Composition Overview
The macronutrient composition of Keto Chicken Salad reveals a balanced blend of low carbs, high protein, and healthy fats, making it an ideal choice for your dietary goals.
With only about 2 grams of carbohydrates per serving, this salad is perfect for those following a low carbohydrate diet. You'll find around 18 grams of protein in each serving, which supports muscle maintenance and keeps you feeling full longer.
The fat content is approximately 27 grams, primarily derived from healthy sources like mayonnaise and nuts, contributing to its creamy texture. This is essential for achieving that satisfying mouthfeel while adhering to a ketogenic lifestyle.
Additionally, the Keto Chicken Salad is packed with essential vitamins and minerals, including Vitamin A and Iron, ensuring it remains a nutritious choice for your meals.
Whether you're looking for a quick lunch or a filling dinner, this salad offers a healthy meal option that aligns with your dietary needs.
Health Benefits Highlighted
Keto Chicken Salad offers a wealth of health benefits, thanks to its balanced nutrition that supports your dietary goals. By choosing this dish, you're not just enjoying a delicious meal; you're also fueling your body with essential nutrients.
- Low carbohydrate content: With only 2 grams of total carbohydrates per serving, it fits perfectly into your ketogenic lifestyle.
- High in protein: Each serving provides about 18 grams of protein, which is vital for muscle maintenance and keeping you satisfied throughout the day.
Additionally, the inclusion of fresh vegetables and herbs guarantees you're getting essential vitamins and minerals, enhancing the overall nutritional profile of your meal.
At around 330 calories per serving, Keto Chicken Salad is a low-calorie option that aligns with your health goals.
Enjoying this healthy meal not only supports your weight management efforts but also contributes to a balanced diet, making it a fantastic choice for anyone looking to lead a healthier lifestyle.
Additional Recipes and Resources
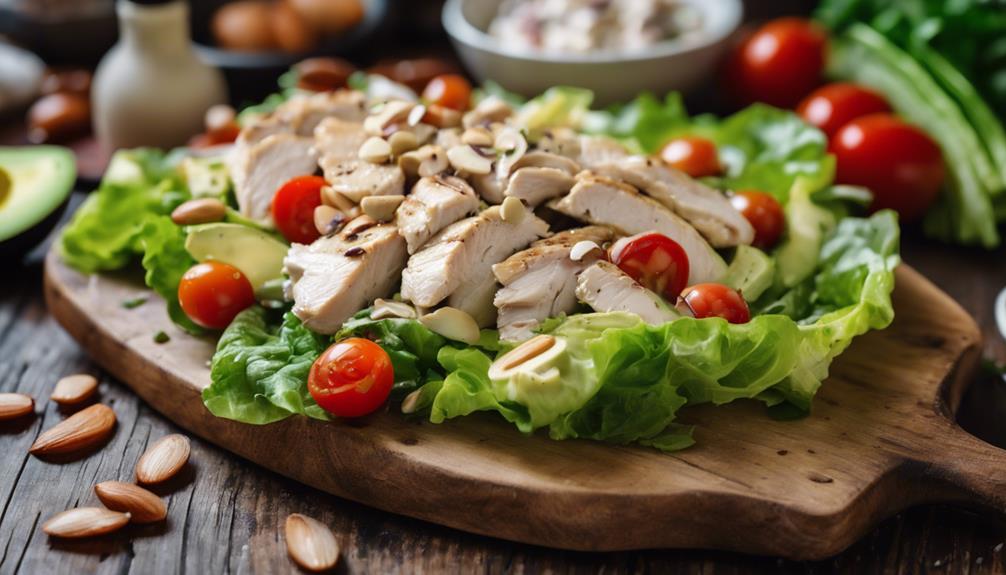
Exploring a variety of recipes and resources can enhance your meal planning while keeping your diet exciting and nutritious.
If you're following a keto diet, you'll love the Low Carb Avocado Shrimp Bowls and Mediterranean Chicken Skillet. These dishes not only align with your low carb goals but also bring vibrant flavors to your plate. For those quick and easy meals, the 15-Minute Red Curry Noodles (Vegan) provide a plant-based option that fits right into your healthy eating plan.
Don't forget to check out the Clean Eating Recipe Binder, which contains over 100 healthy recipes catering to various dietary preferences, including low carb and gluten-free choices. You can also explore Mediterranean Bowls With Chicken for a flavorful, low-carb lunch packed with fresh ingredients.
To streamline your meal planning, utilize resources and tools from Wholesome Yum Foods, giving you easy access to zero sugar cooking ingredients and keto-friendly meal ideas.
With these additional recipes and resources, you'll find it simple to maintain a clean eating lifestyle while enjoying diverse and delicious meals throughout the week!
Tips for Success
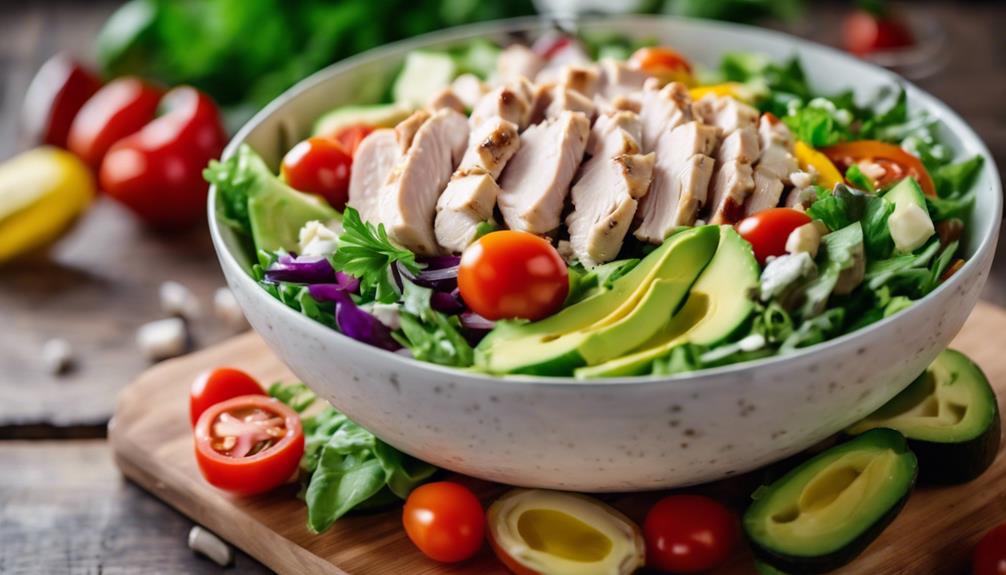
To create a delicious keto chicken salad, focus on evenly shredding the chicken and chopping your vegetables uniformly for the best texture and flavor.
Here are a few tips to elevate your salad:
- Use fresh herbs like parsley and dill for added flavor and aroma.
- Chill the salad for at least 1-2 hours before serving to allow the flavors to meld.
When you shred chicken, aim for consistency to improve the overall eating experience. Uniformly chopped vegetables not only boost visual appeal but also guarantee balanced bites. Incorporating fresh herbs will make your easy low-carb chicken salad even more enjoyable.
Don't forget to chill the salad! This step is essential for achieving a cohesive taste.
If you're looking for a fun way to serve it, consider using lettuce wraps instead of traditional bread. They make for a healthy keto option that's both delicious and satisfying.
With these tips, you'll whip up a keto chicken salad that's bursting with flavor and texture, perfect for any meal!
Storage Guidelines
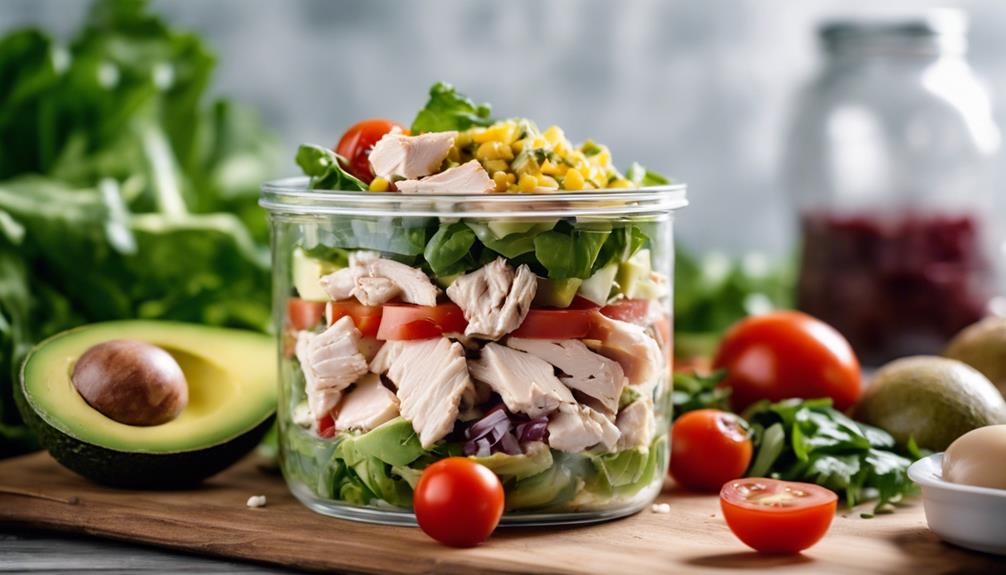
Proper storage is essential for keeping your chicken salad fresh and flavorful throughout the week. You can store your leftover Keto Chicken Salad in an airtight container in the refrigerator for up to 5-7 days. This guarantees maximum freshness and flavor retention. It's important to keep the salad covered to avoid it absorbing odors from other foods in the fridge.
For ideal taste, let the salad chill in the refrigerator for at least 1-2 hours before serving. This chilling time helps meld the ingredients, enhancing the overall flavor.
However, if you notice the salad appears dry after storage, don't worry! Simply mix in a small amount of additional mayonnaise or dressing to restore creaminess.
Recipe Variations
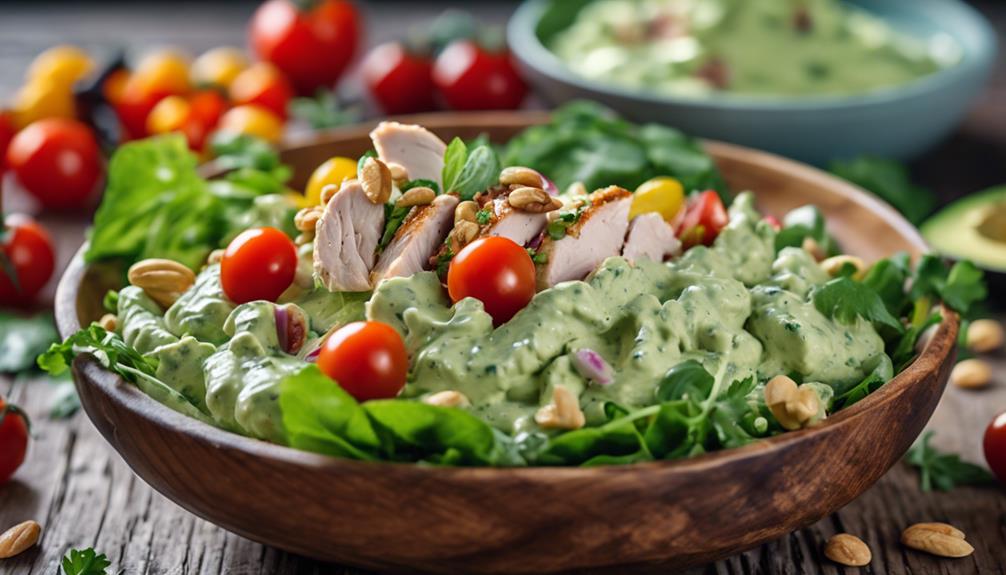
You can easily switch up your Keto Chicken Salad with various recipe variations to keep your meals exciting and flavorful. Here are some ideas to inspire you:
- Avocado Chicken Salad Recipe: Replace mayonnaise with mashed avocados and add lime juice for a creamy, fresh texture.
- Chicken Salad with Tzatziki: Incorporate tzatziki sauce for a tangy, Mediterranean twist that pairs well with the chicken.
Feel free to combine ingredients and adjust the seasonings to suit your taste. You can also add chopped walnuts for crunch or experiment with water chestnuts.
If you prefer a spicier kick, try a Buffalo Chicken Salad by adding hot sauce and ranch seasoning. For a lighter option, serve your keto chicken salad in a lettuce wrap.
Don't forget to add salt and pepper to enhance the flavors. These recipe variations not only diversify your meals but also guarantee you stay on track with your keto diet while enjoying delicious flavors.
User Experiences and Feedback
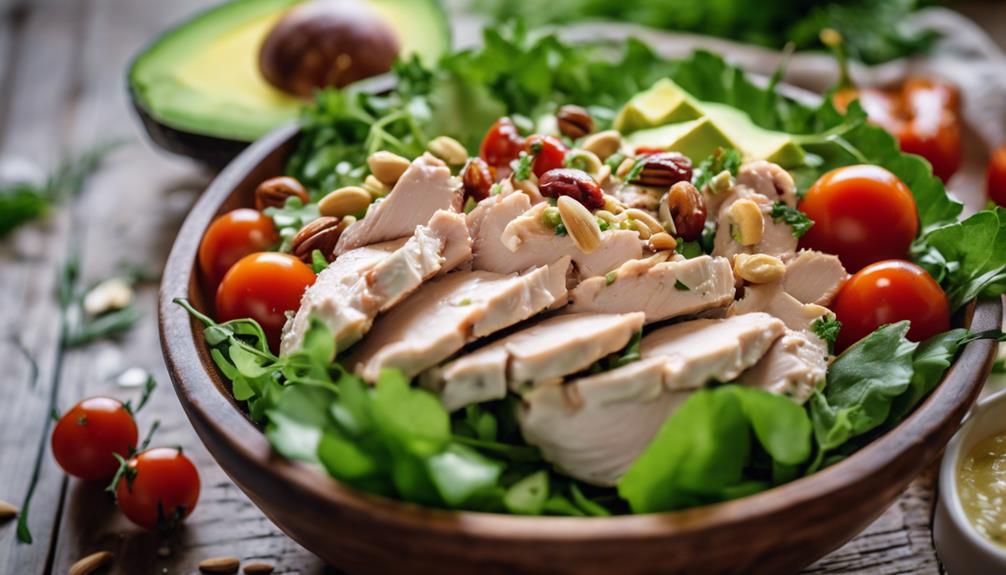
Users rave about the Keto Chicken Salad, praising its flavor and satisfying crunch that make it a go-to for healthy lunches. Many find the recipe not only flavorful but also incredibly easy to prepare, with most completing it in under 30 minutes. This efficiency is a huge plus for those with busy schedules, allowing you to whip up a nutritious meal in no time.
Feedback consistently highlights the salad's crunchy texture, thanks to the addition of pecans and fresh vegetables. These elements elevate the eating experience, making each bite enjoyable and satisfying.
Additionally, users love the customization options, which let you adapt the recipe based on what you have on hand or your personal tastes. This flexibility guarantees that you can make the Keto Chicken Salad your own, keeping it interesting every time you prepare it.
With a high rating of 4.73 from 22 votes, the salad has garnered numerous positive reviews, solidifying its status as a favorite among those seeking healthy lunches. Overall, the Keto Chicken Salad continues to impress with its delightful combination of flavors and textures.
Frequently Asked Questions
Can I Eat Chicken Salad While Trying to Lose Weight?
Yes, you can eat chicken salad while trying to lose weight. It's high in protein and low in carbs, helping you feel full longer. Just make sure to choose healthy ingredients and control portion sizes.
How Many Carbs Are in a Keto Chicken Salad?
A keto chicken salad typically contains about 2-3 grams of total carbohydrates per serving. By incorporating low-carb vegetables and high-protein ingredients, you can enjoy a delicious meal while staying within your carb limits.
Can I Eat Chicken Everyday on Keto?
Yes, you can eat chicken every day on keto. It's high in protein, low in carbs, and versatile. Just mix in different cuts and pair with low-carb veggies to keep your meals exciting and nutritious.
Can I Eat Salad Everyday on Keto?
Imagine a vibrant garden on your plate! Yes, you can eat salad every day on keto. Load it with leafy greens, healthy fats, and proteins, and you'll stay satisfied while keeping carbs low. Enjoy the variety!
Can Chicken Spinach Tortilla Pizza be a Keto-friendly Option for a Healthy Meal?
Looking for a low calorie chicken tortilla pizza to fit your keto diet? Try a chicken spinach tortilla pizza! With a low-carb tortilla crust, lean chicken, and nutrient-packed spinach, it’s a delicious and healthy option for those watching their macros. Enjoy a guilt-free meal without sacrificing flavor.
Conclusion
Incorporating this keto chicken salad into your meal plan not only satisfies your taste buds but also supports your health goals.
With its creamy avocado twist and simple preparation, it's a dish you can enjoy any day of the week.
Why settle for boring meals when you can indulge in something delicious and nutritious?
Give it a try, and you'll see how easy it is to make healthy eating exciting and enjoyable!
Recipes
Make Delicious Egg Muffin Recipe in Minutes!
Just imagine a quick and tasty breakfast option – discover how to make delicious egg muffins that you can customize to your liking!
You can easily make tasty egg muffins in minutes! Begin by preheating your oven to 375°F. In a bowl, mix together 10 large eggs and 1/3 cup half and half until smooth. Stir in 1 cup of diced cooked ham, 3/4 cup finely chopped red bell pepper, and 1/4 cup shredded sharp cheddar cheese. Grease a muffin tin and fill each cup with about 1/3 cup of the egg mixture. Bake for 19-23 minutes or until cooked through. Allow to cool slightly before enjoying! Feel free to get creative with customizing your egg muffins to suit your preferences!
Key Takeaways
- Preheat your oven to 375°F (190°C) for optimal baking before starting your egg muffin preparation.
- Whisk together 10 large eggs, 1/3 cup half and half, and your choice of seasonings for a creamy mixture.
- Stir in cooked ham, chopped red bell pepper, and shredded cheddar cheese for added flavor and nutrition.
- Fill muffin cups about 2/3 full with the egg mixture and bake for 19-23 minutes until set.
Ingredients for Egg Muffins
To make delicious egg muffins, you'll need 10 large eggs, 1/3 cup of half and half, cooked ham, red bell pepper, and shredded sharp cheddar cheese. This easy breakfast recipe offers a fantastic way to start your day with a protein-packed meal. The star of the dish is, of course, the eggs, which create a fluffy mixture when whisked together with half and half.
Incorporating colorful bell peppers and green onions not only enhances the flavor but also adds a nutritious twist. You can customize your egg muffins by swapping in different cheese, like mozzarella or feta, to suit your taste. Consider adding seasonings like salt, pepper, oregano, or basil to elevate the flavor profile further.
If you're feeling adventurous, mix in additional ingredients such as cooked sausage, bacon, or even spinach and mushrooms for extra variety. Don't forget to spray your muffin tin with cooking spray to guarantee easy removal of the muffins once they're baked.
With these ingredients, you're well on your way to creating a delightful batch of egg muffins that make breakfast both simple and satisfying!
Simple Preparation Steps
Start by preheating your oven to 350°F (175°C) to prepare for baking the egg muffins. While the oven heats up, grease your muffin tin with cooking spray or oil. This step is essential to prevent sticking and guarantee easy removal of the breakfast egg muffins later on.
Next, grab a bowl and whisk together 12 eggs, ½ cup of chopped vegetables, and your choice of seasonings. This mixture forms a flavorful base for your muffins. Once combined, pour the egg mixture into your prepared muffin cups, filling each about ¾ full. This allows room for the muffins to rise during baking.
Now, it's time to bake! Place the muffin tin in your preheated oven and let them bake for 20-25 minutes. To check for doneness, insert a knife near the center of a muffin; if it comes out clean, the eggs are set and firm, indicating they're ready to come out of the oven.
Enjoy the delightful aroma as your breakfast egg muffins cook to perfection, and get ready for a delicious meal!
Baking and Serving Instructions
Carefully preheat your oven to 375°F (190°C) for ideal baking results.
While the oven heats, whisk together 10 large eggs and 1/3 cup of half and half in a large bowl until fully combined. This will give your egg mixture a creamy texture. Next, mix in 1 cup of diced cooked ham, 3/4 cup of finely chopped red bell pepper, and 2/3 cup of shredded sharp cheddar cheese for extra flavor and nutrition.
Once your mixture is ready, spray your muffin pan with cooking spray to prevent sticking. Fill each muffin cup with about 1/3 cup of the egg mixture. Place the muffin pan in the preheated oven and bake for 19-23 minutes, or until the eggs are set and lightly golden on top.
After baking, allow the muffins to cool in the pan for about 10 minutes. This cooling period makes it easier to gently remove the muffins from the muffin pan without breaking them.
Once cooled, they're ready for serving. Enjoy your delicious egg muffins as a quick breakfast or snack!
Storage and Freezing Tips
How can you keep your egg muffins fresh and delicious for longer? Proper storage is key to maintaining their quality and preventing spoilage. Here are some tips to help you store and freeze your egg muffins effectively:
Let your muffins cool completely before storing to avoid moisture buildup.
Use an airtight container in the refrigerator for storage; they'll stay fresh for up to 3 days.
For longer storage, individually wrap each muffin in foil, then place them in a freezer-safe container. You can freeze them for up to 3 months.
When you're ready to enjoy one, simply thaw it overnight in the refrigerator. This guarantees even warming and helps prevent sogginess.
To reheat, pop it in the microwave for about 20-30 seconds per serving for a quick meal.
Flavor Variations and Suggestions
Elevate your egg muffins by experimenting with various flavor combinations and ingredients to suit your taste preferences.
Start by incorporating sautéed vegetables like spinach, mushrooms, or diced tomatoes to enhance both the nutritional value and flavor profile of your egg muffins. These veggies not only add color but also pack a healthy punch.
Next, try different cheese varieties such as feta, pepper jack, or mozzarella for unique tastes and textures in each batch. If you're looking for a heartier option, mix in cooked proteins like crumbled bacon or breakfast sausage, making your muffins perfect for a filling breakfast on the go.
Don't forget to spice things up! Adding herbs and spices like garlic powder, Italian seasoning, or jalapeños can bring an exciting kick and depth of flavor to your muffins.
If you prefer a vegetarian option, consider substituting eggs with plant-based egg alternatives while including a variety of colorful vegetables for a satisfying, meat-free meal.
With these suggestions, you'll create delicious egg muffins that cater to any palate.
Frequently Asked Questions
Why Are My Egg Muffins Spongy?
Your egg muffins might be spongy because of overmixing, too much liquid, low baking temperature, or underbaking. Make certain you balance ingredients, preheat the oven, and check for doneness to achieve a firmer texture.
How Do You Make Egg Muffins Not Stick?
To prevent your egg muffins from sticking, grease the muffin tin well, use silicone cups, or line with parchment paper. Let them cool briefly and run a knife around the edges before removal.
Why Are My Egg Muffins Watery?
Your egg muffins might be watery due to overcooking or excess liquid from ingredients. Use fresh, drained vegetables, bake at the right temperature, and let them cool briefly to achieve a firmer texture.
Why Did My Egg Muffins Sink?
If your egg muffins sink, it's likely due to overmixing, undercooking, or using heavy ingredients. Make certain you're balancing the batter, baking fully, and avoiding too many dense additions for perfect muffins every time.
Conclusion
With this egg muffin recipe, you'll reveal the secret to breakfast bliss in just minutes!
Imagine waking up to a golden, fluffy masterpiece that makes your taste buds dance like nobody's watching.
You'll be the breakfast hero of your kitchen, with friends and family begging for your secret recipe!
So grab those ingredients, whip up your magic, and get ready to serve up the most delicious egg muffins that'll have everyone raving for weeks!
Enjoy the culinary fame!
Recipes
Enjoy a Sweet Potato Fries Recipe That’s Guilt-Free!
Make delicious, guilt-free oven-baked sweet potato fries that are crispy and flavorful—discover the secret to the perfect snack!
If you are looking for a guilt-free snack option, consider making oven-baked sweet potato fries! To start, cut two medium sweet potatoes into 1/4-inch pieces and soak them in cold water for about 30 minutes to enhance crispiness. After drying, toss the sweet potatoes in olive oil and your favorite seasonings. Bake at 400°F for approximately 35 minutes, remembering to flip them halfway through for even crispiness. Serve with zesty dips or add an herbal drizzle to elevate the flavor. Keep exploring for additional tips and tricks to elevate your sweet potato fries!
Key Takeaways
- Oven-baked sweet potato fries are a nutritious alternative to traditional fries, offering both flavor and health benefits.
- Soak cut sweet potatoes in cold water for at least 30 minutes to enhance crispiness by removing excess starch.
- Coat fries in olive oil and seasonings like paprika or garlic powder for added flavor and a crispy texture.
- Bake at 400°F for 20 to 35 minutes, flipping halfway to ensure even browning and crispiness.
Recipe Overview
Oven-baked sweet potato fries are a deliciously healthy side dish that offers a crispy texture and vibrant flavor, making them a perfect alternative to traditional fries.
This sweet potato fries recipe is simple and allows you to enjoy the natural sweetness of the potatoes while keeping your meal guilt-free. Start by cutting the sweet potato into uniform fry-sized pieces; this guarantees even cooking and helps achieve that desired crispiness.
Before baking, soak the cut sweet potato in cold water to remove excess starch, which is key to getting them extra crispy. After soaking, drain and pat them dry, then coat the fries with your choice of oil and seasonings like paprika or garlic powder for added flavor.
Spread the fries in a single layer on a baking sheet, making sure they aren't overcrowded. This assists them bake evenly during the ideal baking time of about 35 minutes.
After baking, you'll have perfectly crispy, oven-baked sweet potatoes that are tender on the inside and full of flavor, making them a fantastic side dish for any meal. Enjoy your guilt-free treat!
Key Ingredients
To create the perfect guilt-free sweet potato fries, you'll need a few key ingredients that not only enhance flavor but also boost nutrition. These ingredients work together to guarantee your baked sweet potato fries turn out delicious and crispy without the guilt.
Sweet Potatoes: The star of the dish! These nutrient-dense tubers can be left with the skin on for added fiber and vitamins.
Olive Oil: A healthy oil that helps achieve that crispy texture while minimizing unhealthy fats. Just a light coating will do the trick.
Corn Starch: This magic ingredient is added to your seasoning mixture to create a crispy exterior during baking. It's essential for that perfect crunch!
Sea Salt: Enhances the overall flavor of your fries. You can also experiment with other seasonings like garlic powder, smoked paprika, or even cayenne pepper for some heat.
With these key ingredients in hand, you're well on your way to whipping up a batch of delicious baked sweet potato fries that are both satisfying and guilt-free!
Preparation Steps
Begin by washing and scrubbing two medium-sized sweet potatoes. Then cut them into consistent fry-sized pieces about 1/4-inch thick for even cooking.
Next, soak the cut sweet potatoes in cold water for at least 30 minutes. This step's essential because it removes excess starch, helping you achieve crispy fries when baking.
After soaking, rinse the fries thoroughly and pat them dry with a paper towel to eliminate any moisture that could lead to sogginess.
In a bowl, toss the dried fries with 1 to 2 tablespoons of olive oil and your preferred seasonings, including salt, ensuring they're evenly coated for ideal flavor.
Baking Techniques
To get the best sweet potato fries, you need to pay attention to a few key baking techniques.
Start by setting your oven to the right temperature, as this can make or break your crispiness.
Also, arranging your fries properly and adjusting the cooking time will help you achieve that perfect texture without any sogginess.
Optimal Oven Temperature
Preheating the oven to 400°F often strikes the perfect balance for baking sweet potato fries, ensuring they cook evenly and achieve that desired crispiness.
Here's how you can optimize your baking process for the best results:
- Choose a large sweet potato: Cutting it into uniform fries helps them cook at the same rate.
- Use a baking sheet with parchment: This prevents sticking and promotes even cooking.
- Spread fries in a single layer: Overcrowding can trap moisture, which hinders the formation of crispy fries.
- Toss the fries halfway through baking: This allows for even browning and enhances crispiness on all sides.
If you want an extra crunch, consider increasing the temperature to 450°F, but be sure to monitor closely to prevent burning.
Remember, flipping the fries during cooking is key to achieving that perfect texture.
Cooking Time Adjustments
Adjusting cooking time is key to achieving the perfect texture for your sweet potato fries, especially as the thickness of the cuts can greatly impact how quickly they bake.
When you make your fries, remember that thinner cuts typically require less time to make crispy outside, while thicker ones need additional minutes.
Preheat your oven to between 400°F and 450°F, depending on how crispy you want them.
Spread the fries in a single layer on a parchment-lined baking sheet, using cooking spray to avoid sticking.
The baking time generally ranges from 20 to 35 minutes, but time may vary based on the size of your fries. Flip them halfway through to guarantee an even golden brown color on all sides.
Towards the end, consider opening the oven every five minutes to release moisture, which enhances crispiness.
If your fries still don't look done, don't hesitate to adjust the baking time slightly; keep an eye on them to prevent burning.
With these tips, you'll achieve perfectly cooked sweet potato fries that are guilt-free and delicious!
Fry Arrangement Importance
Arranging sweet potato fries in a single layer on the baking sheet is vital for achieving that perfect crispy texture you want. When you overcrowd the baking sheet, the fries can steam instead of bake, resulting in soggy fries.
To make certain your sweet potato fries turn out crispy and delicious, follow these tips:
- Space them out: Keep at least a quarter-inch between each fry to promote even cooking and air circulation.
- Use multiple sheets wisely: If you have a lot of fries, use multiple baking sheets and rotate their positions halfway through baking. This step helps in achieving consistent browning.
- Consider a wire rack: Placing a wire rack on top of your baking sheet elevates the fries, allowing air to circulate underneath for extra crispiness.
- Preheat your oven: Always make sure your oven is preheated to the right temperature before baking. This helps in getting that crispy finish.
Serving Suggestions
To elevate your sweet potato fries, serve them with zesty dips like homemade chipotle mayo or cilantro-lime aioli. These flavorful additions enhance the natural sweetness of the fries and make every bite more enjoyable.
If you're looking for a balanced meal, pair your fries with baked fish or roasted vegetables. This combination not only complements the sweet potato's flavor but also adds nutritional value to your plate.
For those who crave a bit more heat, drizzling your fries with spicy ketchup or BBQ sauce can take your dish to the next level.
To make your presentation pop, don't forget to garnish your fries with fresh herbs like rosemary or parsley. This simple touch adds color and freshness, making your meal visually appealing.
If you have any leftover fries, store them in an airtight container for up to three days. When you're ready to enjoy them again, reheating in the oven will help retain their crispiness.
With these serving suggestions, your sweet potato fries will be a delicious and guilt-free treat that everyone will love!
Customization Ideas
You can easily customize your sweet potato fries to suit your taste.
Experiment with different flavor enhancements like spices or fresh herbs, and don't forget to try out creative dipping sauces that take your fries to the next level.
With a bit of imagination, you'll have a unique snack that's perfect for any occasion.
Flavor Enhancements
Elevate your sweet potato fries by incorporating flavorful enhancements that cater to your taste preferences. These simple additions can transform your fries into a gourmet treat. Here are some customization ideas to try:
- Parmesan Cheese: Sprinkle freshly grated Parmesan cheese during the last few minutes of baking. This adds a rich, savory flavor that pairs beautifully with the sweetness of the potatoes.
- Spicy Seasoning Blend: Mix cayenne pepper or chili powder into your seasoning blend before coating the fries. Adjust the amount based on your heat preference for a personalized kick.
- Fresh Herbs: Experiment with fresh herbs like rosemary or thyme. Adding them to the fries before baking introduces an aromatic twist that enhances their natural sweetness.
- Honey Drizzle: After baking, drizzle your fries with a touch of honey or maple syrup. This creates a delightful sweet and savory contrast that elevates the overall taste.
These flavor enhancements can make your sweet potato fries even more enjoyable, so don't hesitate to get creative and tailor them to your liking!
Creative Dipping Sauces
Exploring creative dipping sauces can take your sweet potato fries to the next level, offering a burst of flavor with every bite. You have plenty of options to choose from, ensuring that your fries never get boring.
For a smoky twist, whip up a homemade chipotle mayo by blending mayonnaise with chipotle peppers. This sauce adds a delicious kick that complements the natural sweetness of the fries.
If you're in the mood for something zesty, try making a cilantro and lime aioli. Just blend mayonnaise with fresh cilantro, lime juice, and garlic to create a revitalizing dip. A tangy BBQ sauce also pairs well, balancing the sweet potato's flavor perfectly—ideal for summer cookouts.
For a healthier choice, consider a yogurt-based dipping sauce. Mix Greek yogurt with herbs and spices for a creamy, protein-rich alternative that's both satisfying and guilt-free.
Finally, don't overlook the delightful combination of honey mustard; just mix equal parts honey and Dijon mustard for a sweet and savory contrast that's sure to impress.
With these creative dipping sauces, your sweet potato fries will shine!
Community Feedback
The lively discussion around the sweet potato fries recipe reflects a vibrant community enthusiastic to share tips and personal experiences. With 185 comments, it's clear that many of you have engaged deeply, especially about achieving the perfect crispiness for your fries.
Here are some key takeaways from the community feedback:
- Air Frying: Many users recommend using an air fryer for a crunchier texture, stating that it can greatly improve the overall experience.
- Soaking: A popular tip is to soak the sweet potato fries before cooking. This step helps draw out excess starch, leading to better crispiness.
- Baking Sheet Tips: Avoid overcrowding your baking sheet. This simple adjustment can prevent soggy fries and guarantee even cooking.
- Timing & Temperature: Experimenting with different timing and temperature settings during baking can help you find your perfect method, tailoring the recipe to your taste.
These insights not only enhance your cooking experience but also show how a supportive community can help elevate a simple dish into a delicious favorite.
Immerse yourself in these suggestions and enjoy your guilt-free sweet potato fries!
Frequently Asked Questions
Why Didn't My Sweet Potato Fries Get Crispy?
Your sweet potato fries didn't get crispy likely due to excess moisture, overcrowding the baking sheet, or not soaking them enough. Guarantee uniform cuts, soak, coat with cornstarch, and give them space for best results.
What Makes Sweet Potato Fries Better?
Sweet potato fries are better because they're packed with nutrients, lower in calories, and have a lower glycemic index. Their rich flavor shines with spices, making them a delicious, healthier alternative to regular fries.
Why Put Sweet Potato Fries in Ice Water?
Imagine crisp, golden sweet potato fries that crunch delightfully with each bite. Soaking them in ice water removes excess starch, prevents sogginess, and enhances texture, giving you the perfect base for that irresistible crispiness.
What to Eat With Sweet Potato Fries?
You can pair sweet potato fries with chipotle mayo, garlic aioli, or classic ketchup for dipping. They also complement grilled chicken, baked fish, or roasted veggies, adding nutrition and flavor to your meal.
Can Your Guilt-Free Sweet Potato Fries Recipe be Baked in the Oven?
Yes, your guilt-free oven baked sweet potato fries recipe can definitely be baked in the oven. Simply toss the sweet potato fries in a bit of olive oil and seasoning, then spread them out on a baking sheet. Bake at 425°F for 20-25 minutes, flipping halfway through for crispy perfection. Enjoy!
Conclusion
To sum up, you've just mastered a guilt-free sweet potato fries recipe that's sure to impress your friends at the next cookout—or even a virtual gathering over Zoom.
By using simple ingredients and clever baking techniques, you've created a delicious snack that's both healthy and satisfying.
So, grab your favorite dipping sauce and enjoy your homemade fries like it's the 21st century!
Keep experimenting, and who knows what other tasty treats you'll whip up next!
Recipes
Indulge in Healthy Banana Berry Crepes Recipe!
Get ready to savor Healthy Banana Berry Crepes that are quick to make and bursting with flavor—discover the secret to perfecting this delicious recipe!
You’re going to adore treating yourself to Healthy Banana Berry Crepes! They’re a delicious combination of oats, ripe bananas, and fresh berries, providing approximately 250 calories per serving. Prepare the batter in just 10-15 minutes, perfect for your hectic mornings. These crepes are not only tasty but also loaded with nutrients like fiber and antioxidants. Add yogurt or honey on top for an extra special touch. Additionally, they’re customizable – you can easily swap out the ingredients! If you’re interested in learning more about tips and tricks for perfecting crepes, there’s plenty to discover.
Key Takeaways
- Enjoy a quick and nutritious breakfast with Healthy Banana Berry Crepes, ready in just 10-15 minutes.
- The recipe features oats and ripe bananas for natural sweetness and fiber-rich energy.
- Customize your crepes with almond milk and various sweeteners to suit your taste.
- Enhance the flavor with fresh berries and top with yogurt or honey for added benefits.
Recipe Overview and Benefits
Healthy Banana Berry Crepes aren't only a delicious treat but also a smart choice for your breakfast or dessert, offering a balanced mix of nutrients and flavor.
Made with healthy banana and whole wheat flour, these crepes are simple to make and provide a satisfying way to start your day or indulge your sweet tooth.
With around 250 calories per serving, they're a guilt-free option that won't derail your healthy eating goals.
Each serving delivers essential carbohydrates, protein, and fats, ensuring you get a balanced intake, which is vital for energy and overall wellness.
When you add fresh berries, you're not just enhancing the flavor; you're also increasing the vitamin and fiber content, supporting your digestive health and helping with weight management.
Plus, the preparation time is just 10-15 minutes, making these crepes a convenient choice for busy mornings or last-minute desserts.
Whether you're looking to impress guests or simply treat yourself, Healthy Banana Berry Crepes fit perfectly into various meal occasions, proving that nutritious breakfast foods can also be deliciously indulgent.
Essential Ingredients and Alternatives
When making your Healthy Banana Berry Crepes, you'll want to gather key ingredients like oats, a ripe banana, and almond milk.
Don't worry if you don't have everything on hand; there are plenty of suitable substitutions you can use.
Let's explore these essential ingredients and the alternatives that can fit your dietary needs.
Key Ingredient Highlights
The essential ingredients for these banana berry crepes combine wholesome oats and cinnamon with a ripe banana, egg, and almond milk to create a nutritious and flavorful base. These ingredients not only contribute to the delightful taste but also guarantee your crepes are healthy and gluten-free.
Here are the key ingredients you'll need:
- Oats: They provide fiber and energy, making your crepes filling and satisfying.
- Ripe Banana: This healthy banana adds natural sweetness and moisture, enhancing the overall flavor.
- Almond Milk: A great alternative to regular milk, almond milk keeps the recipe dairy-free while delivering a creamy texture.
Using these ingredients, you'll enjoy a nutrient-packed dish that's perfect for breakfast or a snack.
Plus, you can customize the sweetness with options like honey or stevia, guaranteeing it fits your taste preferences.
Whether you're making these crepes for yourself or sharing with friends, you'll appreciate how simple yet delicious they are.
Enjoy the blend of flavors and the health benefits they bring!
Suitable Substitutions Available
You can easily customize the banana berry crepes by incorporating suitable substitutions for the essential ingredients based on your dietary needs or preferences.
If you're looking for a vegan option, simply replace the egg with 1 tablespoon of flaxseed mixed with 2.5 tablespoons of water. This mixture acts as a binding agent, keeping your crepes together.
For those needing a gluten-free alternative, swap regular oats with instant oats or use a gluten-free flour blend in place of all-purpose flour.
When it comes to milk, almond milk can be replaced with any preferred milk alternative, such as soy milk or oat milk, or even regular cow's milk if that suits you better.
You can also adjust the sweetness of your crepes by using substitutions like stevia, honey, or brown sugar, ensuring you find the perfect balance for your taste.
To boost the nutritional value, consider adding a scoop of protein powder to the batter.
With these substitutions, you can enjoy delicious banana berry crepes that fit your dietary needs without sacrificing flavor or texture.
Step-by-Step Preparation Guide
To make your healthy banana berry crepes, you'll want to start with some key ingredient preparation tips.
Knowing the right cooking techniques will help you achieve perfectly cooked crepes every time.
Let's break down the steps to guarantee you get the best results!
Ingredient Preparation Tips
Start by blending your dry ingredients, including oats and cinnamon, into a fine powder for a smooth crepe batter base. This step is essential for making easy-to-make crepes for breakfast that are both delicious and healthy.
Next, prepare your wet ingredients. Follow these steps:
- Combine Ingredients: In a blender, mix together half a banana, an egg (or 2 egg whites for a lighter option), and almond milk until well blended.
- Adjust Consistency: If the batter seems too thick, add a little more almond milk until it pours easily.
- Heat the Skillet: Preheat your nonstick skillet over medium heat, ensuring it's ready for cooking.
Once your batter is ready, you can pour a thin layer onto the skillet to form your crepe. Wait until mini bubbles appear on the surface before flipping for perfect cooking.
Fill your crepes with fresh fruits like strawberries and bananas. For extra flavor, consider adding nonfat Greek yogurt or a drizzle of honey. Enjoy your healthy banana berry crepes!
Cooking Techniques Explained
Blending the dry ingredients into a fine powder is the first essential step for creating a smooth crepe batter that sets the foundation for delicious banana berry crepes. Start by combining oats and cinnamon in a blender until you achieve a fine consistency.
Next, add a ripe banana, an egg (or egg whites), and almond milk to the blender. Blend until the mixture forms a smooth batter.
Now, heat a non-stick pan over medium heat. Pour about 3-4 tablespoons of the batter onto the pan, swirling it gently to create a thin layer. Cook until you see mini bubbles forming on the surface, then flip the crepe to cook the other side for another minute.
Once cooked, let the crepes cool slightly for easier handling. Fill each crepe with fresh strawberries and banana slices, and consider topping them with nonfat Greek yogurt or a drizzle of honey.
Use a spatula to fold the filled crepes in half or quarters, ensuring the filling stays intact. For an even better texture, chill the batter for 15-30 minutes before cooking.
Enjoy your healthy banana berry crepes!
Cooking Tips for Perfect Crepes
Using a non-stick pan makes flipping crepes much easier and helps prevent sticking for a smoother cooking experience. To guarantee you achieve the perfect crepes, follow these essential tips:
- Blend the batter: Mix your ingredients until smooth and let the batter chill for 15-30 minutes. This resting period allows the gluten to relax, resulting in thin, delicate crepes.
- Swirl to spread: Pour 3-4 tablespoons of batter into your heated non-stick pan, then quickly swirl it around to create an even, thin layer. This technique promotes even cooking and prevents thick crepes that can be hard to manage.
- Watch for signs: Cook crepes for about 1-2 minutes on each side. Flip them once you see amber lacing forming on the edges, signaling they're ready to turn.
User Reviews and Community Feedback
With 166 glowing comments, users rave about the delicious taste and easy preparation of the Healthy Banana Berry Crepes, making it a hit among both novice and experienced cooks.
User reviews highlight the crepes' perfect balance of flavors, with many calling them a delightful twist on traditional pancake recipes. The simple preparation process means you won't spend hours in the kitchen, and first-time cooks find it especially accessible.
Community engagement on social media adds to the excitement, as users share their own twists on the recipe. Some suggest pairing the healthy banana flavor with peanut butter or experimenting with various fruits for an extra punch. This creativity fosters a sense of camaraderie among cooking enthusiasts who can't wait to showcase their delectable creations.
Furthermore, the feedback reveals a growing demand for inclusivity. Users have expressed interest in dietary alternatives, such as vegan options, showing the community's desire for diverse, healthy cooking.
Health Benefits of Ingredients
The Healthy Banana Berry Crepes not only satisfy your taste buds but also pack a variety of health benefits thanks to their nutritious ingredients.
When you indulge in these crepes, you're fueling your body with essential nutrients that promote overall well-being.
Here are three key benefits:
- Dietary Fiber: The oats in the crepes provide a rich source of dietary fiber, which aids digestion and keeps you feeling full longer. This is great for managing your weight.
- Potassium: Bananas are loaded with potassium, helping to regulate blood pressure and support heart health. Including them in your crepes means you're taking care of your cardiovascular system.
- Antioxidants and Protein: Fresh berries add antioxidants that boost your immune system and improve skin health, while nonfat Greek yogurt gives you a protein-packed topping that promotes muscle recovery and gut health.
With each bite, you're not just enjoying a delicious treat; you're also nourishing your body with a wonderful blend of nutrients that contribute to a healthy lifestyle!
Serving and Storage Suggestions
Serve your Healthy Banana Berry Crepes immediately for the best flavor and texture. Freshly made, they're delightful with the warm filling and soft crepe.
If you have leftovers, you can stack them with baking parchment in between and store them in the refrigerator for up to 2 days. Make sure to cover filled crepes with plastic wrap or place them in an airtight container to maintain their freshness.
For longer storage, you can freeze your crepes for up to 3 months. Just remember to thoroughly defrost them before reheating. To reheat, simply warm the crepes briefly in a non-stick pan or microwave. This will help restore their softness and make them enjoyable again.
When serving, feel free to add some extra toppings like yogurt, maple syrup, or more fresh fruits for a delicious twist. You can also get creative and serve them with a drizzle of nut butter or a sprinkle of nuts for added texture.
Enjoy your Healthy Banana Berry Crepes right away, or store them properly for a tasty treat later!
Frequently Asked Questions
Are Crepes Healthy for Weight Loss?
Yes, crepes can be healthy for weight loss. By using whole ingredients and filling them with fruits, you can create a nutritious meal that satisfies cravings while keeping calories in check. Enjoy them guilt-free!
How Do You Make Joanna Gaines Crepes?
You'll create the lightest, fluffiest crepes ever! Just whisk together flour, milk, eggs, and a dash of sugar, then cook them in a non-stick skillet until golden. Fill with your favorite fruits for a delightful treat!
How Many Calories in a Banana Crepe?
A typical banana crepe has about 53 calories per serving. If you add fruits or toppings, the total calorie count can range from 280 to 335, depending on your choices and ingredients.
Why Add Butter to Crepe Batter?
Adding butter to your crepe batter enhances flavor, creates a tender texture, and promotes a golden-brown color. It also helps prevent sticking, making flipping easier, while adding creaminess that complements sweet fillings like fruits or chocolate.
Can Raw Carrot Cake Powerballs Be a Healthy Addition to Banana Berry Crepes?
Looking to add a healthy kick to your banana berry crepes? Incorporating raw carrot cake powerballs energize into the mix can provide a nutritious boost of vitamins and minerals. These powerballs are a great way to add a burst of flavor and health benefits to your morning meal.
Conclusion
As you savor these healthy banana berry crepes, picture yourself wrapped in a warm embrace of vibrant flavors and nourishing ingredients.
Each bite transports you to a sun-drenched morning, where the sweetness of ripe bananas dances with the tartness of fresh berries.
You're not just enjoying a meal; you're indulging in a moment of joy and energy.
So, gather your loved ones, share the goodness, and let these delightful crepes brighten your day, one delicious layer at a time.
-
Vetted4 months ago
15 Best Sports Recovery Tools to Enhance Your Performance and Speed Up Healing
-
Nutrition6 hours ago
Join the Low Carb Craze and Lose Weight Fast!
-
Nutrition5 hours ago
Eat Healthy With This Atkins Carbohydrate Counter!
-
Nutrition6 hours ago
Get the Keto Ratio Right for Maximum Results!
-
Lifestyle4 months ago
Healthy Lifestyle Blogs – Follow for Inspiration and Tips!
-
Nutrition5 hours ago
Guide : How To Count Calories
-
Lifestyle4 months ago
Healthy Lifestyle Podcast – Tune In for Wellness Tips!
-
Vetted4 months ago
7 Best Books on Ayurvedic Lifestyle for a Healthier You